Apply Tef-Gel to the main hull in the area where the vertical thruster cone spacer will contact the hull. Do NOT get Tef-Gel too close to the hole.
Install the vertical thruster drive train from the inside of the main hull with the motor wires toward the front of the ROV and the thruster shaft through the vertical thruster hole in the main hull.
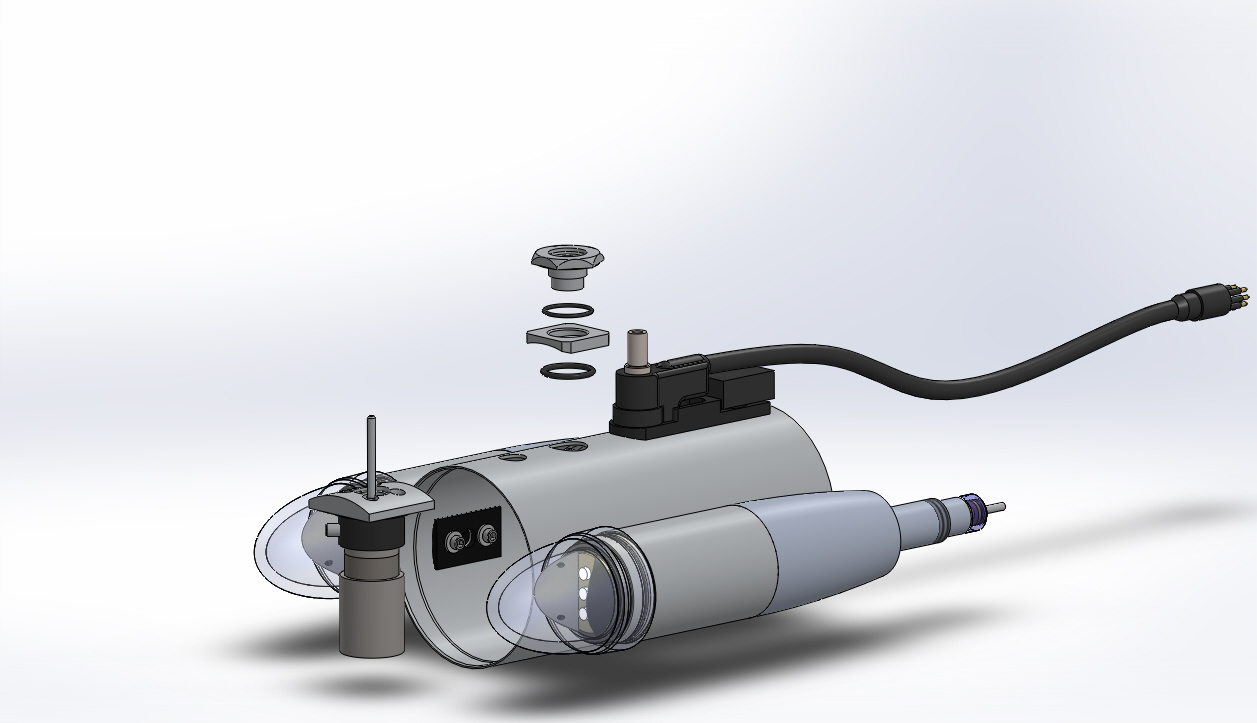
Lubricate and install the #118 O-ring in the vertical thruster spacer.
Replace the vertical thruster spacer over the vertical thruster drive train, with the curved surface towards the hull.
Lubricate and install the #020 O-ring in the vertical thruster dome nut.
Make sure the vertical thruster drive train and spacer are aligned concentrically with the vertical thruster hole in the hull.
Replace the vertical thruster dome nut over the vertical thruster drive train and tighten the nut to 70 inch-pounds (7.9 Nm).
Connect the wires from the vertical motor assembly to the corresponding wires of the ROV wire harness.
Secure the wires to vertical thruster motor assembly using the cable tie.
If the video above doesn't play in your browser, click this play icon to try an alternate method: ,
or click this manual reference icon to view an exploded view