Place the two small thick heat sink pads over the shorter component on the bottom of the ROV power board.
Place the small aluminum heat sink over the pads and taller component on the bottom of the ROV power board.
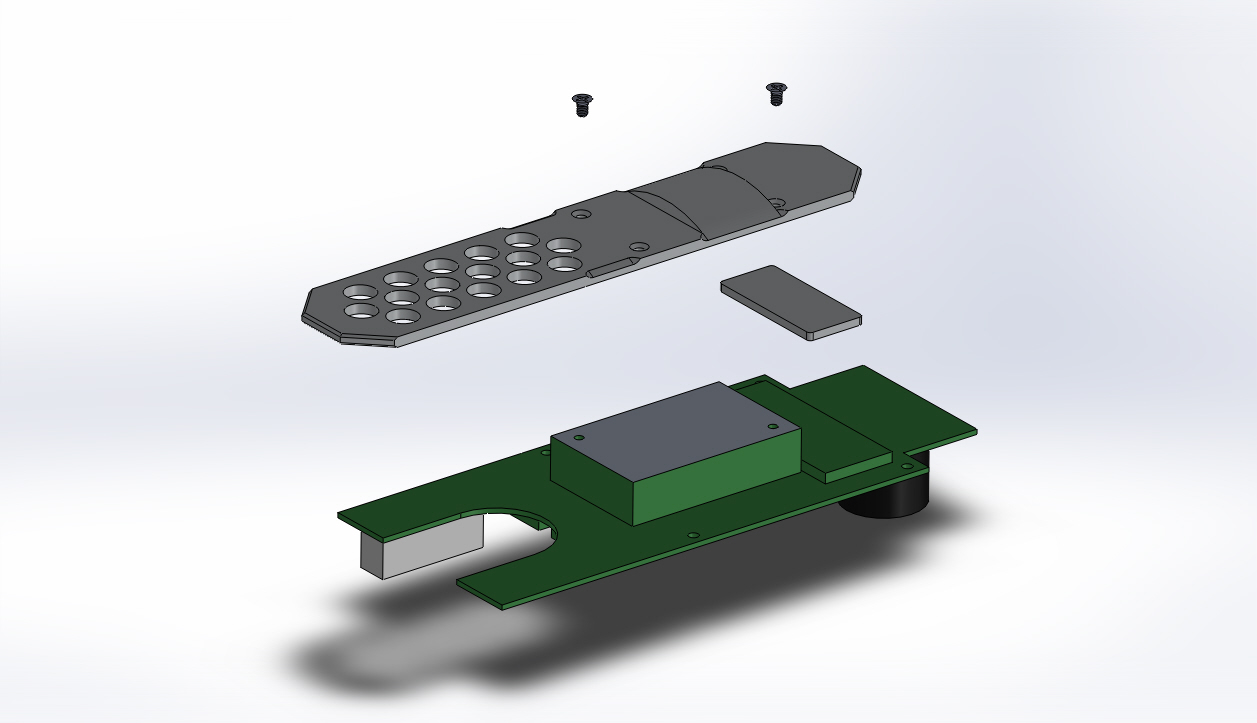
Orient the heat sink at the bottom of the ROV power board so that the curved surface of the heat sink faces away from the ROV power board and the end of the heat sink with the holes is toward the circular cut out in the ROV power board for the vertical thruster.
Align the screw holes in the ROV heat sink and ROV power board.
Replace the two 3 X 5 mm Phillips flat head screws and tighten the screws.
Make sure the thin heat sink pad is in place on the curved part of the heat sink.
If the video above doesn't play in your browser, click this play icon to try an alternate method: ,
or click this manual reference icon to view an exploded view
Tips
Some heat sink bars may have four screws instead of two.